Thursday, December 07, 2006

care for surbo??

surbo... has been quite a debate on its capability and worthiness... some say can feel the response quicker while others say its a waste of money... aftermarket ones cost about RM100 or more... what it does is that it swirl the air into a turbulence so it can be sucked into the throttle body faster.... similar application if u swirl the water in the sink before it goes down....

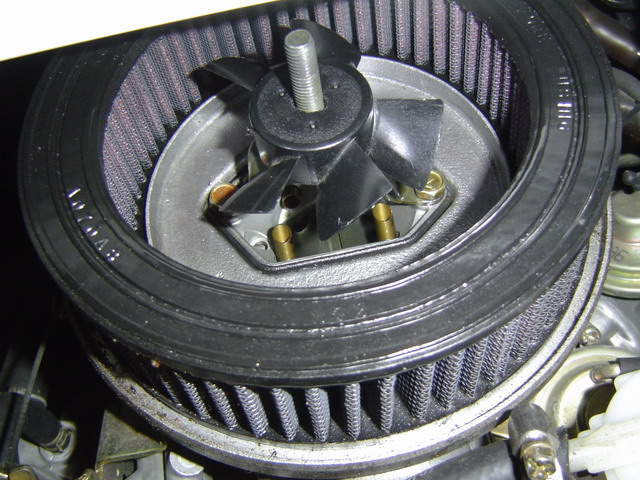
so, i took out my CPU casing fan worth RM5... disect it and remove the blades out...
drill a hole in the middle and fitted it into this...


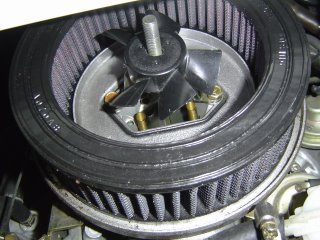
not much difference.... nvm la, 5 bucks only....

OCT level after 1 month plus...

jeng jeng jeng...


even with my wrong hose connection, it still works... got black oil trapped inside... kekekeke....


the other day unker fred told me we can tighten the throttle cable for better response... i did think of it as well as i read the article before in internet...
but mine screw to the max jor.... how leh???


unker fred say need to cut spring liao... but i dun wan kacau the carburettor ler.... if cut adi next time how to sell it if i really wanna install weber carb??...

Wednesday, December 06, 2006

gas-filled rear absorber

my rear oem absorber a bit leaking adi... after so many years of service, i guess its time for retirement...

swapped with this... RM60 per piece... RM15 installation... so, total would be RM135...


no difference after changing...

DIY oil catch tank

next up... diy oil catch tank using petrol filter...

things u need...


then, connect it like this...


actually after i've done it, i noticed i did the wrong connection... it should be like this...


sifoo drexchan and sifoo khguan said its ok with my connection, so till now also havent reconnect the hose... haha... after a month or so only got a bit black oil trapped in my OCT....

DIY engine start button

hmm... long time didnt update my blog adi... been busy since started new sem... timetable damn pack... exams non-stop...

anyway it is... i did some diy on my car again... this time is this:


ooopss.. nolah, this photo is courtesy of ftzone... no money buy nice nice one mah, so i went electronics shop and buy 3 bucks switch...

after that, solder both wire to it....


remove the panel and u'll see this...


check and see which wire to tap... u should tap the starter wire and ignition wire...


very hard to see by that angle ler... luckily i manage to find a screw under it... unscrew it and this pops out...


now i can see which wire to tap...


put back everything... done~!!!


after using it for few days, the switch is busted already...


~~~~~~~~~~~~~~~~~~~~~~~~~~~~~~~~~~~~~~~~~~~~~~~~~~~~~~~~~~~~~~~~~~~~~~~~


actually the method above isnt really suitable... coz the current that pass through starter and ignition wire is very high... thus, small wire doesnt able to handle such high ampere... thats why my cheapo switch busted, couldnt handle the high ampere....

so, there is an alternative solution... use relay lor...
here is the circuit diagram...


i replaced a new similar switch, rewire the circuit according to the diagram, but got stuck... i couldnt get the 12v DC source from ciggie lighter... dunno how to remove the ciggie lighter... hahaha...

anyway, i have plans place the start button elsewhere... which is jz below my gear lever... but first, need to remove the OEM gear lock first...


so, project postponed....